How to build and use a Mast Crane:
By John Myers S/V Y KNOT, W25, 1986,hull #68
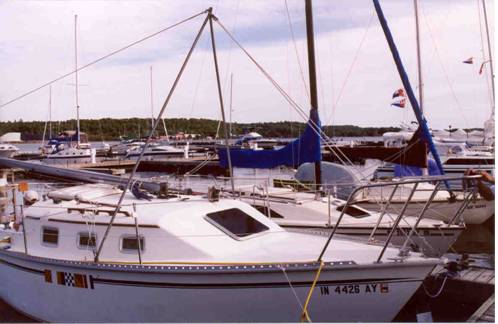
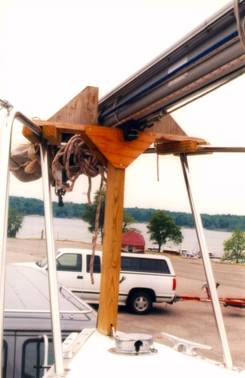
I have built several mast stepping cranes from various materials, for myself and for friends. I first used 1" EMT conduit (thin-wall). This worked for 7 years, 4 times/ year, but was a little to short and marginal on strength so last year I came up with \ a better design using chain link fence top railing.
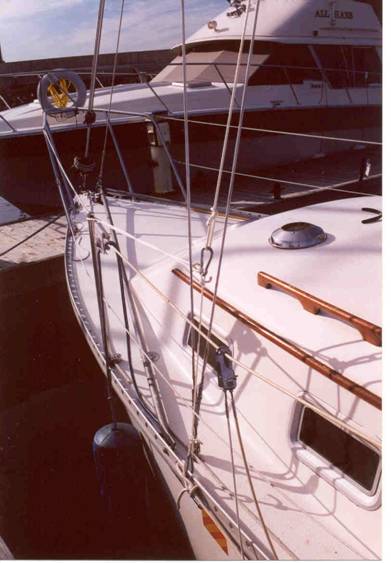
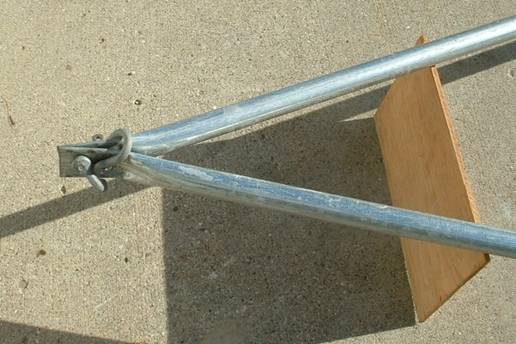
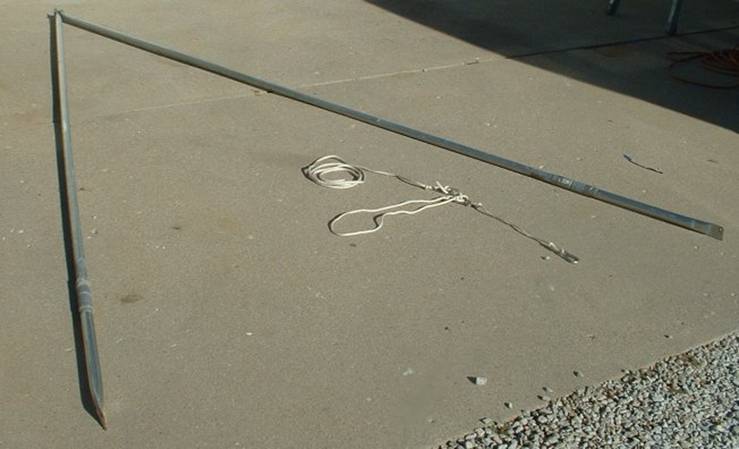
I timed myself building a friend’s. His took 45 minutes to build and cost $20.00 + the shackles. I discovered at a "lowes" building store, top rail for chain link fence. It is thin like EMT but slightly larger, maybe 1.125". Also the top rail has a necked down portion to slip inside another piece and a coupling to strengthen the joint. This allows me to add about 2 feet making the total length about 12'. The short lengths I stow in a locker and the long lengths I keep on the trailer. I make mine just long enough to clear the bow pulpit cross brace and be directly above the forestay attachment point. The other end attaches to the toe rail outboard of the chain plates. Since the crane is always in compression I use duct tape to hold the lengths + the union together. To keep from marring the railing Lowe's also sells nylon 3/4" bushings about 1/4 thick with a 3/8" center hole. This fits the hole in the toe rail. I use Nylon 1" OD 3/8" ID fender washers on each side of the toe rail and Stainless steel fender washers over the outside of this to give it strength. I use a 3/8" stainless steel button head cap screw through the hole with a SS Nylock nut on the inside. I leave this stuff mounted on the toe rail all the time. To keep from tripping on it and cutting my big feet I place the bolt location on the toe rail one hole behind the chain plates. I bent the pipe flat on the ends using a vise and a hammer, drilled the slightly oversize 3/8" clearance holes with my drill press but a portable drill would do fine. The top attachments are 3/8" anchor shackles. Remember to check the clearance of the pipe at the toe rail. The hole has to be drilled off center and the corner rounded so you don't rub on the bottom of the toe rail as the “A” frame pivots up. The bolt hole is only about 1/2" above the bottom of the rail. To get the bend angles on the flat portions right I lay them out on the floor of the garage. Remember the boat is 8'4" wide. The top end need to meet flush with each other. It does not have to be perfect.
A lot of thinking went in to figuring out what parts and where to get them. The actual construction is trivial.
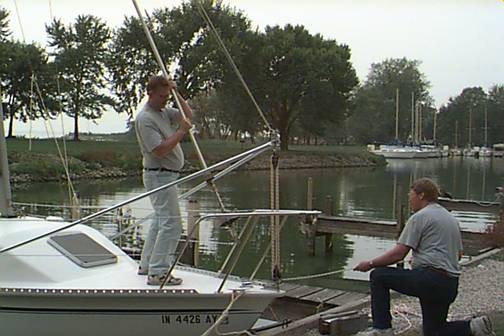
I use my boom-vang for a 4:1 purchase to raise and lower the “A” frame. Any 4 to 1 block and tackle would work. I used to use a 2:1 block using the jib sheet and ran it back to the cockpit to a winch. The problem with this is that without self tailing winches, two people are needed to be in the cockpit and one on the foredeck. Also lines occasionally get caught on something and someone needs to be available to clear them but I did use this system for 10 or more round trips up and down with serious problem other than lack of enough arms.
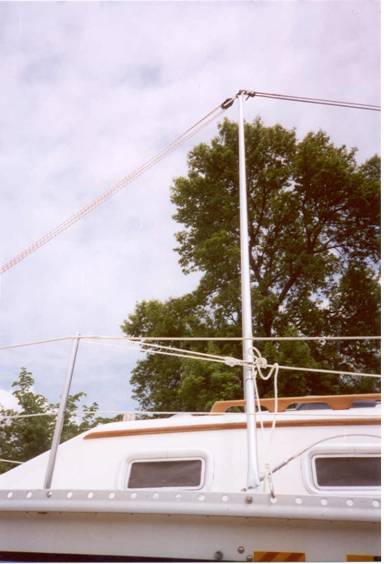
I use the Jib halyard and a spinnaker halyard in parallel from the crane to the mast top. I used to use only one but a friend convinced me that for safety having a backup was a better plan.
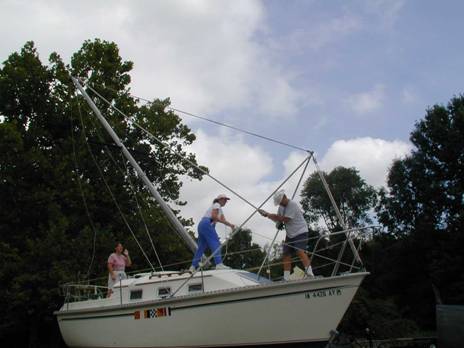
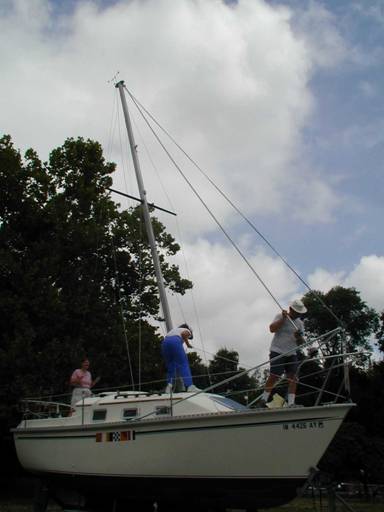
Once the mast crane and 4 to one block and tackle are assembled you are ready to roll the mast back into positon and attach it to the mast step hinge. Note in the pictures the rear mast support is a 12” keel roller to facilitate moving the mast back into position. Note: the mast needs to have a small bolt (a 1/4" is about right) through it's front edge and through the mast step casting. This was not standard at the factory! This is needed to make the mast step pivot up with the mast. From the factory, the mast just sat on the hinged plate and was not attached in any way. Previous owners may or may not have fixed this.
With the mast ready to be raised and the mast crane assembled on the foredeck, raise the mast crane using the jib halyard to the vertical position. When the mast crane is vertical, tie off the halyards. Now you are ready to raise the mast.
Mast Side Support:
I know personally of only 4 Watkins 25 owners besides myself and of those I know of 3 mast steps breaking due to the mast swinging slightly to the side while the mast was being raised or lowered. The mast must be raised perfectly on the center line of the boat and the boat must be level on the water or on the trailer. The problem is once the mast starts to tilt down, the side stays go limp and there is nothing to provide side support. To alleviate this problem, I have designed a side support system. The engineering reason that the side stays go limp is their pivot point is on the deck and the mast is on the cabin top. So to maintain side stay tension the side stay supports must pivot at cabin top height. I hope the photos help because this is a little hard to explain but I fashioned three short lengths of line. The first runs from the toe rail at the chain plates up to cabin top height and terminates in a loop. The second starts with a loop in one end begins at the loop in the other line and goes around the front stanchion post and back to first loop terminating in a loop. I use a carbineer to fasten these and one more loop together. I put a flag halyard cleat on both upper side shrouds about 5 feet above deck level. I use about a 5 foot line with a loop at one end. The loop attaches to the carbineer and the loose end is cinched up tight to the flag halyard block. The same setup is repeated on the other side. This system using light nylon line provides tension but also some stretch incase the pivot point are not perfectly place in relation to the mast step position.
Now that I have written all of this down I need to add it to the W25 manual I am creating!
Good Luck, and enjoy.
Photo Gallery follows: Note: Photo sequence taken over a 5 year time period from various mast raisings and lowerings.
First Details for making a mast crane:


Details of Mast Raising Proceedure: